Connecting to Active Directory CardDAV Address Book on OS X
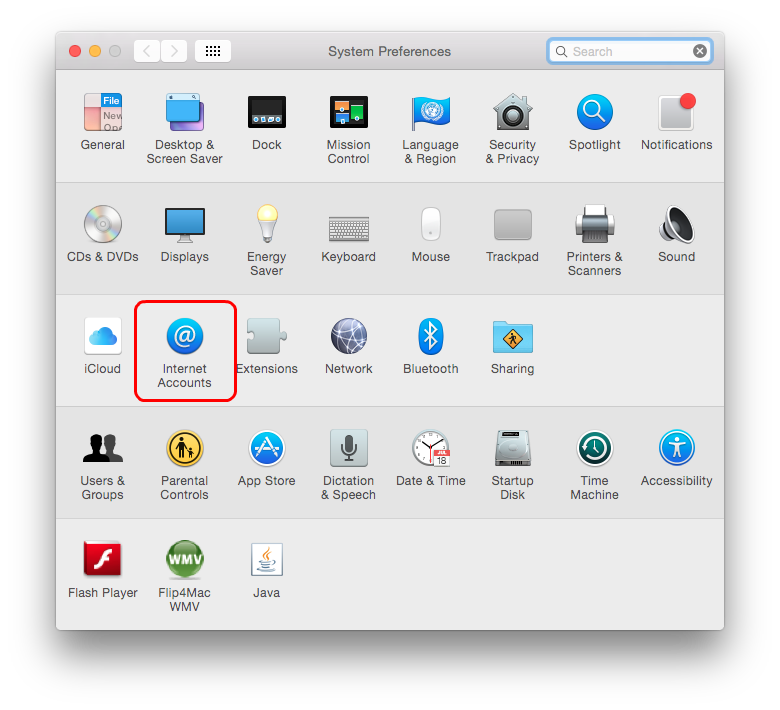
OS X provides built-in CardDAV support. To connect to your Active Directory CardDAV address book go to System Preferences and open Internet Accounts:

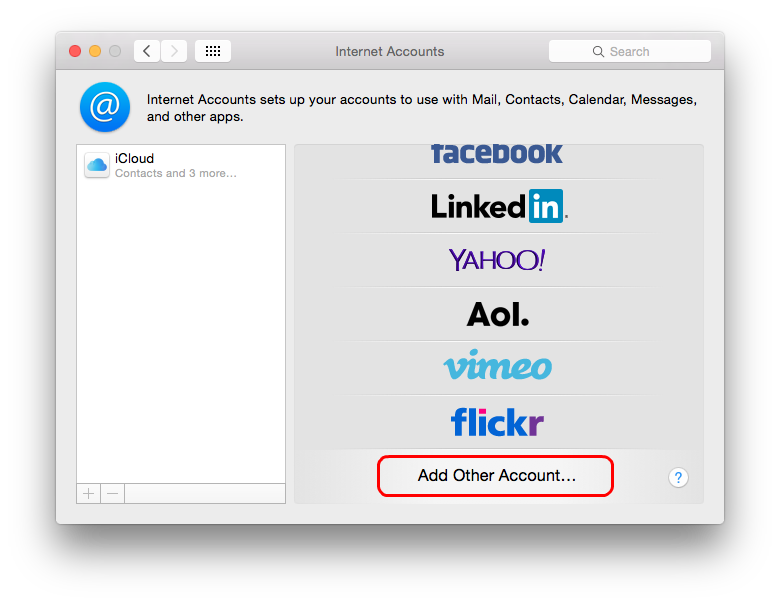
In the Internet Accounts dialog select Add Other Account option:

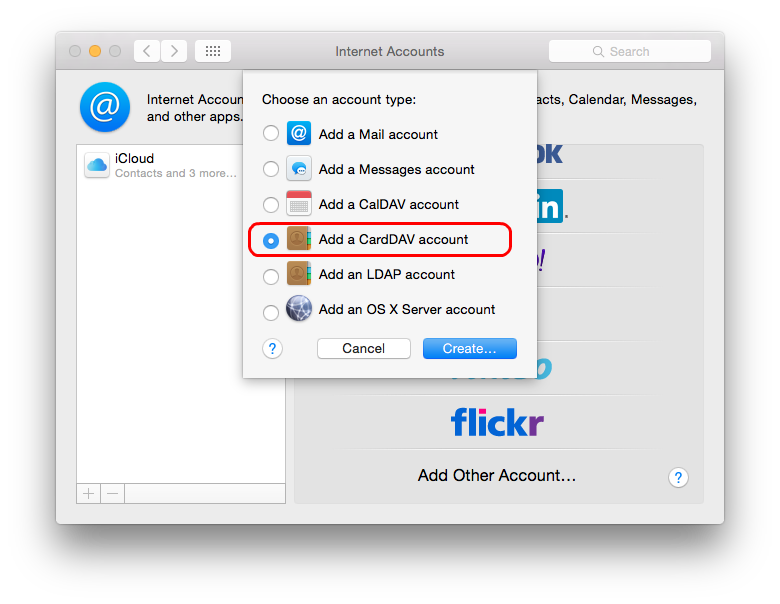
In the Choose an account type dialog select Add CardDAV account option and select Create:

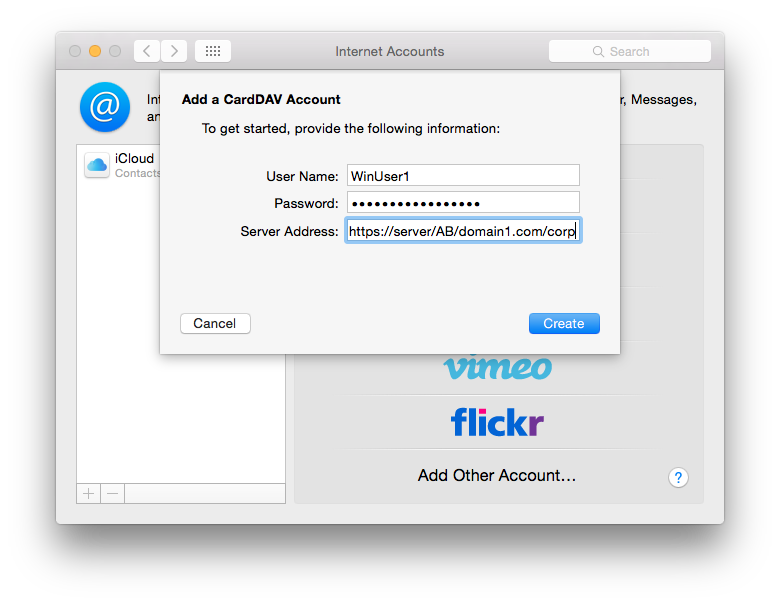
Fill in the connection settings. Specify the complete CardDAV address book URL in the Server Address field. This URL depends on the address book that you want to connect to and provided by your administrator. Also this article describes how to find a URL of the required address book using the IT Hit Active Directory CardDAV Server administrative UI.
It is strongly recommended to use SSL connection to secure your data and credentials.
In the User Name and Password fields provide your windows domain credentials. Select Create.
Important! OS X supports only one domain/user name combination in Internet Accounts. To connect to more that one address book on the same server using same user name (for example to connect to Shared and Corp address books) you need to enter space with any extra characters after user name. The extra characters after last space will be ignored by the server. For example instead of 'WinUser1' specify 'WinUser1 A'.
