IT Hit Active Directory Address Book CardDAV Server ASP.NET Website Installation and Configuration
Here we describe how to prepare ASP.NET website in IIS and install IT Hit Active Directory CardDAV Address Book Server.
Creating a New ASP.NET Website in IIS
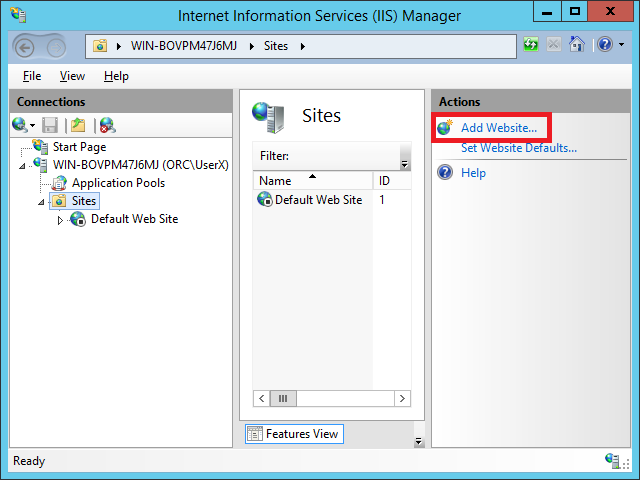
Run the IIS Manager, select Sites node in Connections panel and create a new website selecting Add Website action:
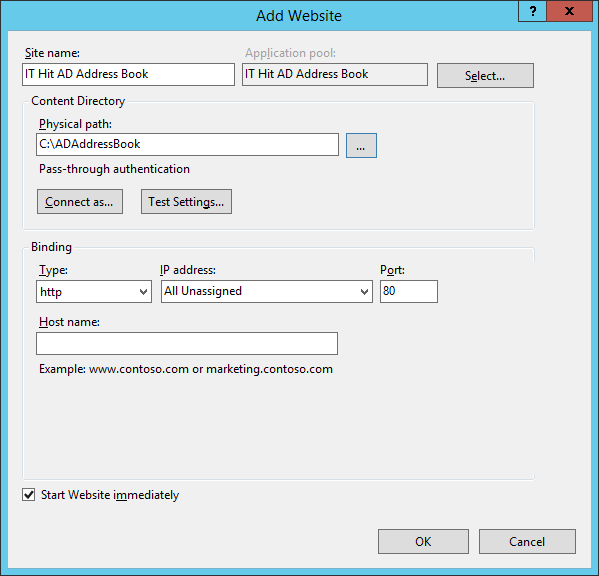
Fill in the Site name and Binding settings in Add Website dialog. Specify ASP.NET 4.0 Integrated Pool and select OK. In the Physical path field specify path to some empty folder in your file system that will contain website content. We will extract website content to this folder using Web Deploy tool later.
Important! Some clients such as OS X may fail to connect to CardDAV server running on non-default HTTP ports. Use default ports 443 or 80 for your AD Address Book CardDAV Server.
Important! The IT Hit AD Address Book CardDAV Server is using Basic authentication to communicate with client applications. It is strongly recommended to use SSL to secure your credentials.
Enabling Handlers and Modules Mappings
The IT Hit Active Directory Address Book CardDAV Server require modules and handlers mapping to be enabled. By default they are disabled in IIS. Here we describe how to enable them for your website.
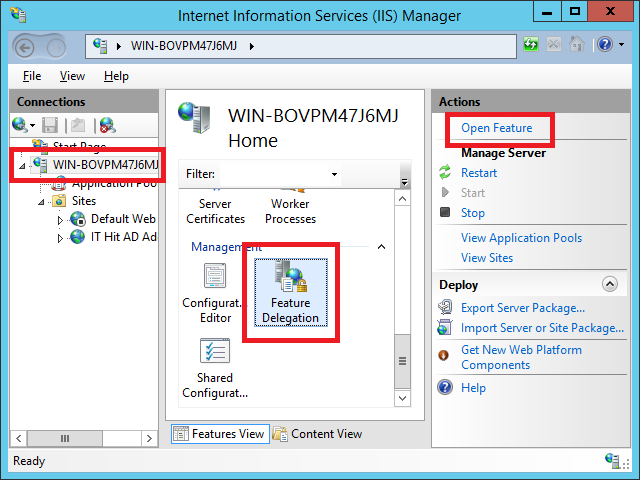
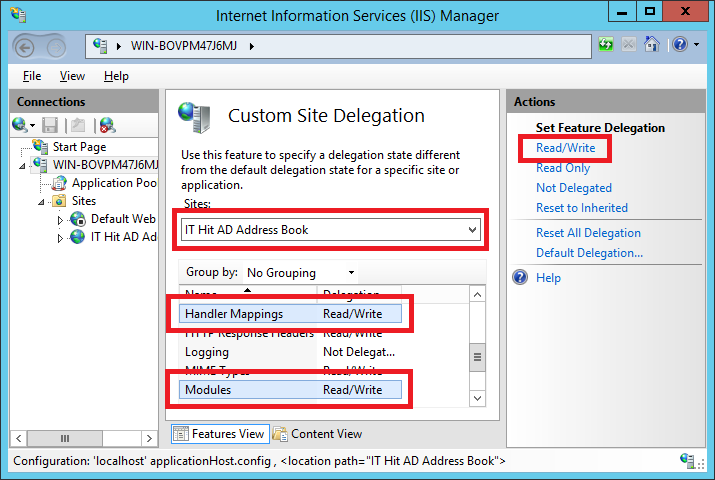
Select the server node (and switch to Feature View if necessary) in IIS and select Feature Delegation. Click Open Feature action:
Select Custom Site Delegation action:
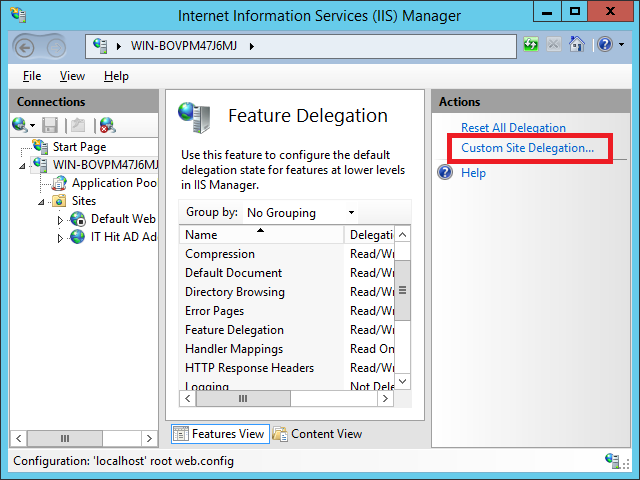
Select your website in a dropdown and set Handler Mappings and Modules to Read/Write.
Installing Website Content Using IIS Web Deploy
The zip file that you download from our website is an IIS Web Deployment package that contains IIS website content and file system permissions configuration in Web Deploy format. Below we will describe how to install the application using Web Deploy in IIS Manager.
If you do not have Web Deploy installed it is from Microsoft website: http://www.iis.net/downloads/microsoft/web-deploy. You can also manually extract and configure the web application without installing Web Deploy.
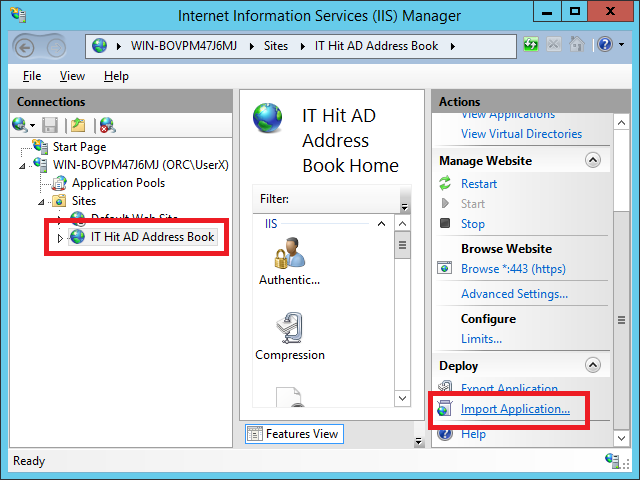
Select your website in Connections panel and select Import Application action:
Provide path to the zip package that you have downloaded and follow the wizard.
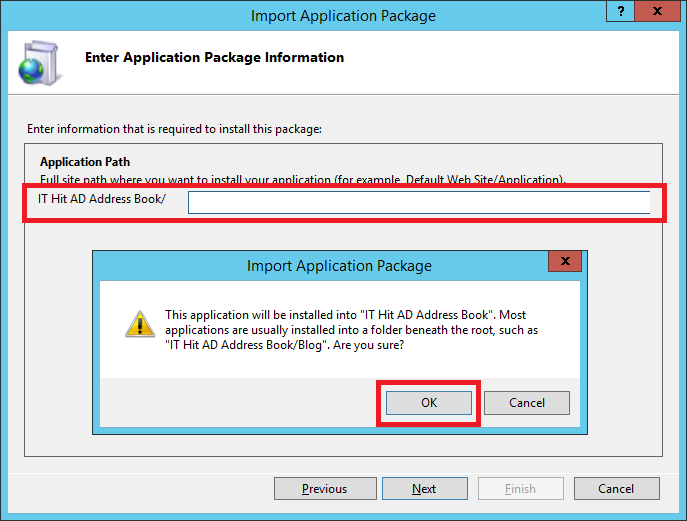
Important! On the Enter Application Package Information step leave the Application Path blank. The web application must be deployed to the root of the web site. Confirm the “This application will be installed into…” message:
Configuring IIS Authentication
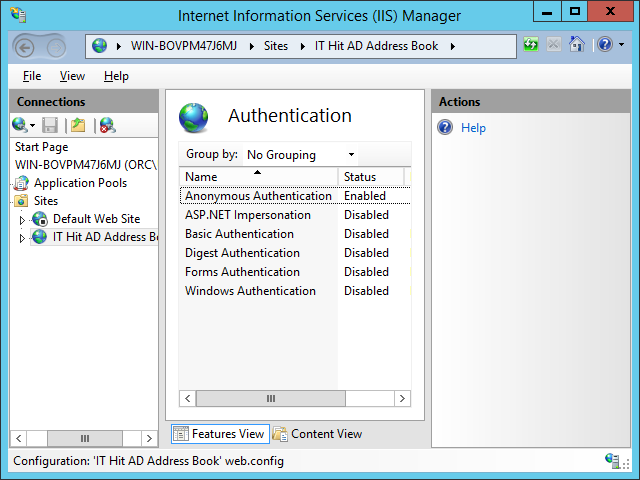
The IT Hit Active Directory Address Book CardDAV Server website is using its own authentication implementation that validates credentials against Active Directory. The server operates on AD with permissions of the user that is accessing the AD Address Book.
The IIS Windows Authentication options (in case you have installed Basic, Digest or Window authentication) must be set to Anonymous:
Setting License File
The product is provided with a free license by default. You can replace it with your purchased license file or with evaluation license.
Download your purchased or evaluation License.lic file in the product download section here. You must put this license file into /App_Data/ folder that is under your web application directory:
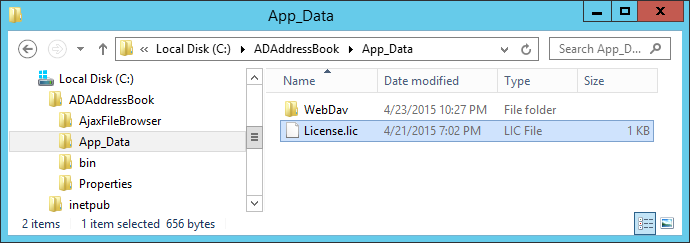
If you want to keep your license file in some other location, you can modify the path to the license file updating the LicenseFilePath setting in web.config.
Configuring LDAP Access to Domain Servers
By default the IT Hit AD Address Book CardDAV Server will try to discover the domain in which the computer running your ASP.NET web application is located. To change this behavior and point your server to a specific LDAP server specify the DefaultLdapServer setting in web.config:
<appSettings>
  <add key="DefaultLdapServer" value="123.123.123.1"/>
  ...
</appSettings>
The server specified in DefaultLdapServer setting will be used to discover domains in the forest and then retrieve their DNS names.
In case your Active Directory domain servers are located on a different network, you can specify DNS name or IP address for each server in ldapMappings list in web.config:
  <ldapMappings>
    <add key="domain1.local" value="123.123.123.1" />
    <add key="domain2.domain1.local" value="123.123.123.2" />
    ...
  </ldapMappings>
After retrieving the DNS name of a domain server from active directory the IT Hit AD Address Book CardDAV Server will translate DNS name using the above ldapMappings table.